
How to Repair a Puncture or Tear in Your FlowMat
A small puncture or tear is an easy fix you can do at home. It takes about 15 minutes of work, plus 18 to 24 hours for the glue to dry.
Your FlowSpace Repair Kit has the patch material: a piece of PVC tarpaulin that you cut to size yourself. It is not peel and stick. It has no sticky backing, and it only holds because of the glue.
The kit does not include glue, so you will need to buy one tube before you start. We tell you exactly which one below.
- Work timeAbout 15 minutes
- Drying time18 to 24 hours
- Skill levelEasy
What you need
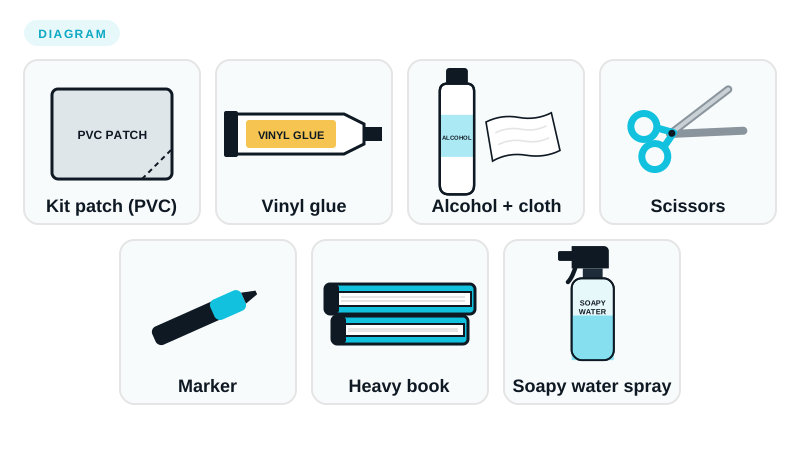
- FlowSpace Repair Kit patch (a piece of PVC tarpaulin you cut to size. It has no sticky backing)
- Vinyl glue (this is what holds the patch on. See our picks below)
- Rubbing alcohol and a clean cloth
- Scissors
- A marker
- A heavy book or flat weight
- Soapy water in a spray bottle (to find the leak)
Which glue to use
The repair kit does not come with glue, so this part matters. Use one of these.
- 1. Best choice
HH-66 Vinyl Cement
Made for PVC inflatables. It stays flexible after it dries and it is waterproof.
Find it on Amazon or at Home Depot online.
- 2. Separate product, no glue needed
TEAR-AID Repair Patch Kit, Type B
Not part of our kit. It is a different patch you buy in a store, and it is peel and stick, so it needs no glue. Use it if you do not have the kit patch or glue. It must be Type B, which is the one made for vinyl.
Find it on Amazon and at many Home Depot stores.
- 3. In a pinch
Any cement made for vinyl or PVC inflatables
Check the label says vinyl or PVC inflatables before you buy.
Do not use
- Super glue. It dries hard and cracks when the mat flexes.
- PVC pipe cement. It is made for rigid plumbing pipe, the wrong material.
Step by step
Step 1: Find the leak
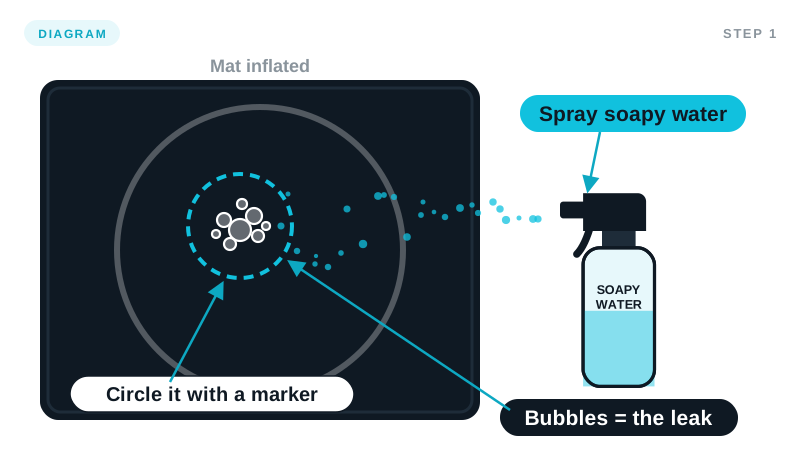
Diagram: bubbles show the leak. Circle it with a marker. Inflate the mat. Spray soapy water over the surface and watch for bubbles.
Bubbles show you where the air is getting out. Circle the spot with your marker.
Step 2: Deflate and lay it flat
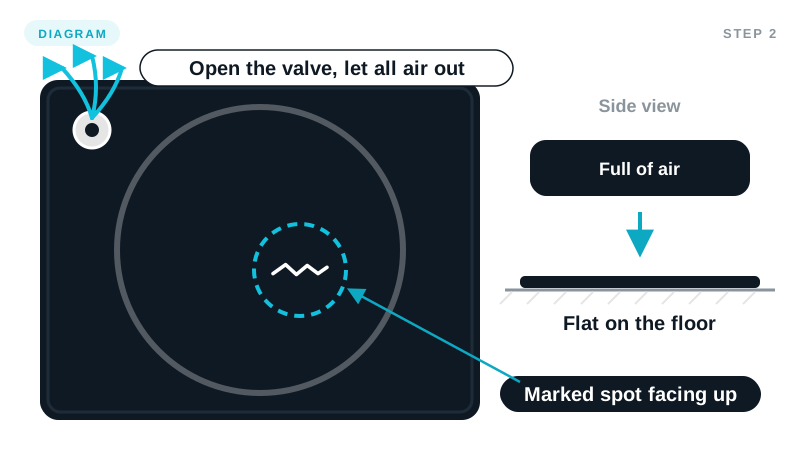
Diagram: fully deflated, flat, marked spot facing up. Let all the air out of the mat. Lay it flat on the floor with the marked spot facing up.
Step 3: Clean the area
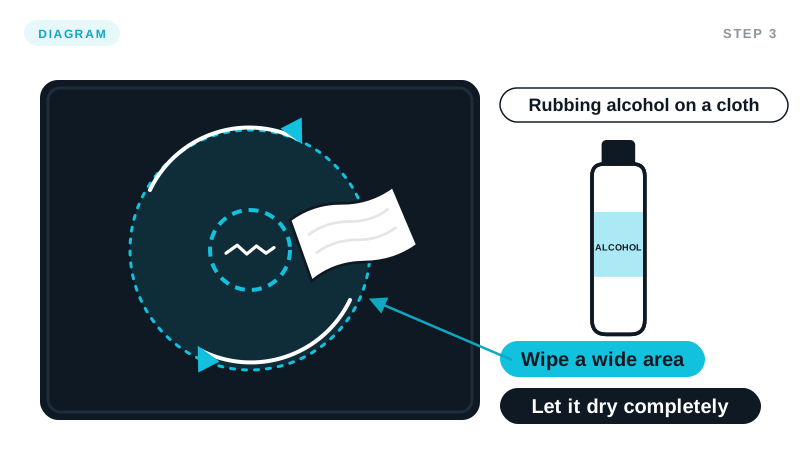
Diagram: clean a wide area, then let it dry. Wipe the area around the damage with rubbing alcohol on a clean cloth. Let it dry completely.
Glue will not hold on a dirty or wet surface, so do not skip this.
Step 4: Cut the patch
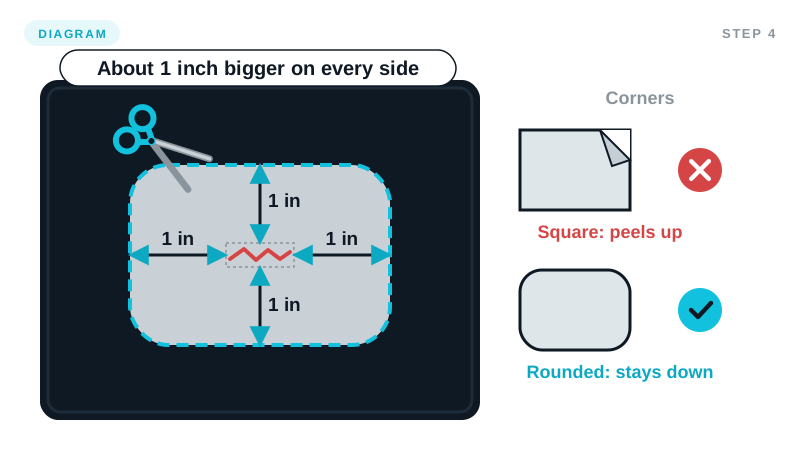
Diagram: about 1 inch bigger on every side, with rounded corners. Cut a piece of the kit patch material about 1 inch bigger than the hole or tear on every side.
Round off the corners with your scissors.
Square corners tend to peel up over time. Round corners stay down.
Step 5: Apply the glue
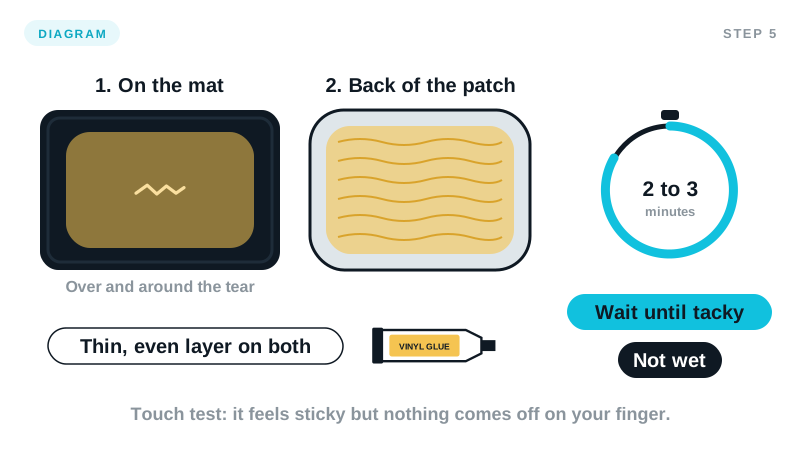
Diagram: glue on the mat over and around the damage, and on the back of the patch. Then wait until tacky. Spread a thin, even layer of HH-66 on the mat, right on top of the puncture or tear and all around it.
Then spread a thin, even layer on the back of the patch too. Glue goes on both.
Wait about 2 to 3 minutes, until both look tacky and not wet.
Step 6: Press the patch on
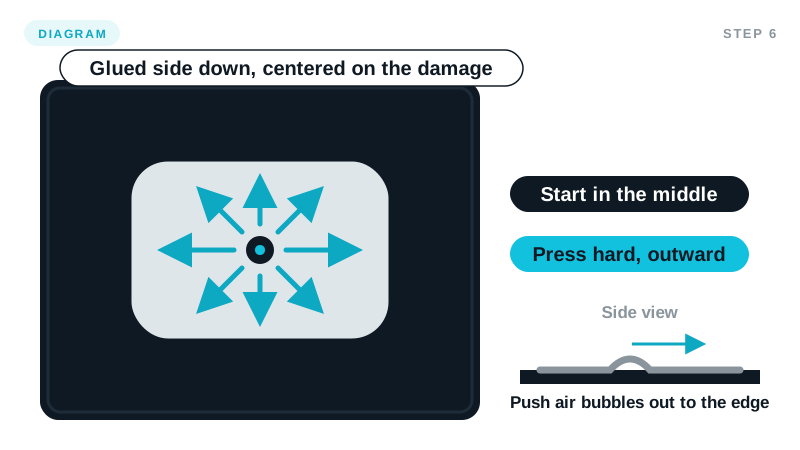
Diagram: press from the middle out to push out air. Press the glued side of the patch onto the glued area of the mat, centered over the damage. Press down hard, starting in the middle and working outward.
This pushes out any air bubbles.
Step 7: Weigh it down for 18 to 24 hours
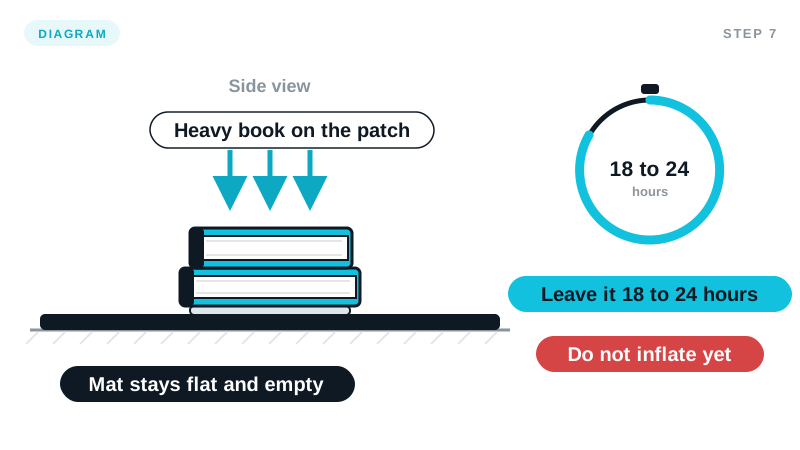
Diagram: a heavy book on the patch for 18 to 24 hours. Lay a heavy book or flat weight on top of the patch. Leave it there for 18 to 24 hours while the glue dries.
Do not inflate the mat during this time. Air pressure on a patch that has not set can pull it loose.
Step 8: Remove the book and check
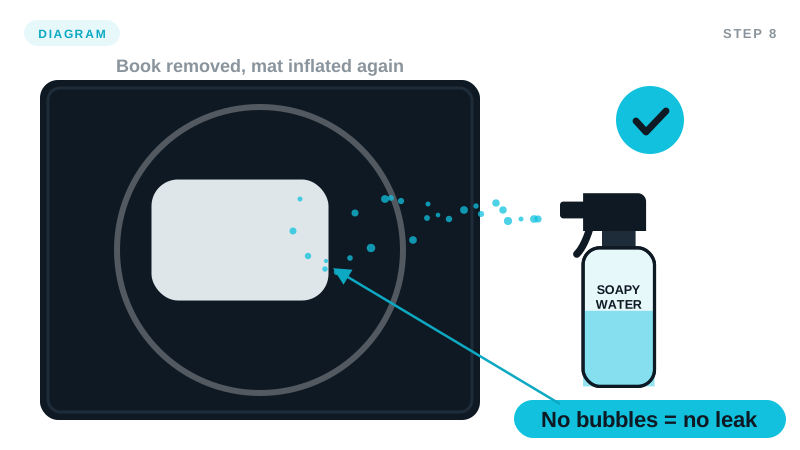
Diagram: book off, mat inflated, no bubbles means no air is leaking. After 18 to 24 hours, remove the book. The repair is done and your mat is good as new.
To make sure, inflate the mat and spray soapy water over the patch. No bubbles means no air is leaking.
No kit patch or glue? A store-bought alternative
TEAR-AID Repair Patch Kit, Type B is a separate product you buy in a store. It is not part of the FlowSpace Repair Kit. It must be Type B, which is the one made for vinyl.
Unlike our kit patch, TEAR-AID is peel and stick. It has its own adhesive, so you do not need glue. Use it only if you do not have the kit patch or glue.
- Find the leak, deflate the mat and clean the area the same way (steps 1 to 3).
- Peel the backing off the TEAR-AID patch.
- Stick the TEAR-AID patch over the damage and press firmly for 2 minutes.
TEAR-AID has its own, shorter wait. It does not need the 18 to 24 hours the glue method needs, but giving it a few hours before hard training is better.
When to contact us instead
Some damage is not a home fix. Email us if:
- The damage is on a seam
- The tear is longer than 2 inches
- The patch does not hold after one try
Email support@flowspacemats.com. We will make it right.
Common questions
Does the repair kit come with glue?
No. The FlowSpace Repair Kit includes the patch material only. We recommend HH-66 Vinyl Cement.
Is the kit patch peel and stick?
No. The kit patch is a plain piece of PVC tarpaulin with no sticky backing. You cut it to size, and it only holds because of the glue you put on the mat and on the back of the patch. If you want a peel and stick patch, TEAR-AID Type B is a separate product you can buy in a store.
Can I use super glue?
No. Super glue dries hard and cracks when the mat bends. PVC pipe cement is also the wrong choice, because it is made for rigid pipe. Use a cement made for vinyl or PVC inflatables.
How long before I can use the mat again?
With the kit patch and HH-66, leave the heavy book on for 18 to 24 hours and do not inflate the mat during that time. Then remove the book, inflate the mat and check the patch with soapy water. If you used TEAR-AID Type B instead, it has its own shorter wait: you can inflate right away, but a few hours before hard training is better.
I cannot find the leak. What now?
Inflate the mat firmly and spray one small section at a time, including around the valve. Small leaks make tiny bubbles, so look closely. If you still cannot find it, email us and we will help.
Can I patch a seam?
Please do not. Seams are welded, not glued, and a patch will not hold there. Email support@flowspacemats.com and we will make it right.
Get Exclusive Training Tips & Deals
Join the FlowSpace community. Be first to know about drops.